
A shipping container arrives at your new facility. Inside sits a critical piece of machinery for your solar module production line—equipment that performed perfectly just weeks ago during its Factory Acceptance Test (FAT) at the supplier’s location in Europe or Asia. The temptation is to uncrate it, position it, and immediately begin the Site Acceptance Test (SAT). But rushing ahead overlooks a crucial intermediate phase that can help you identify and mitigate significant financial and operational risks.
The journey from the supplier’s factory to yours is long and unpredictable. This period between the equipment’s arrival and its final commissioning isn’t downtime; it’s a vital verification stage. A systematic inspection at this point ensures that what you received is precisely what you approved, and that it’s ready for safe installation and testing.
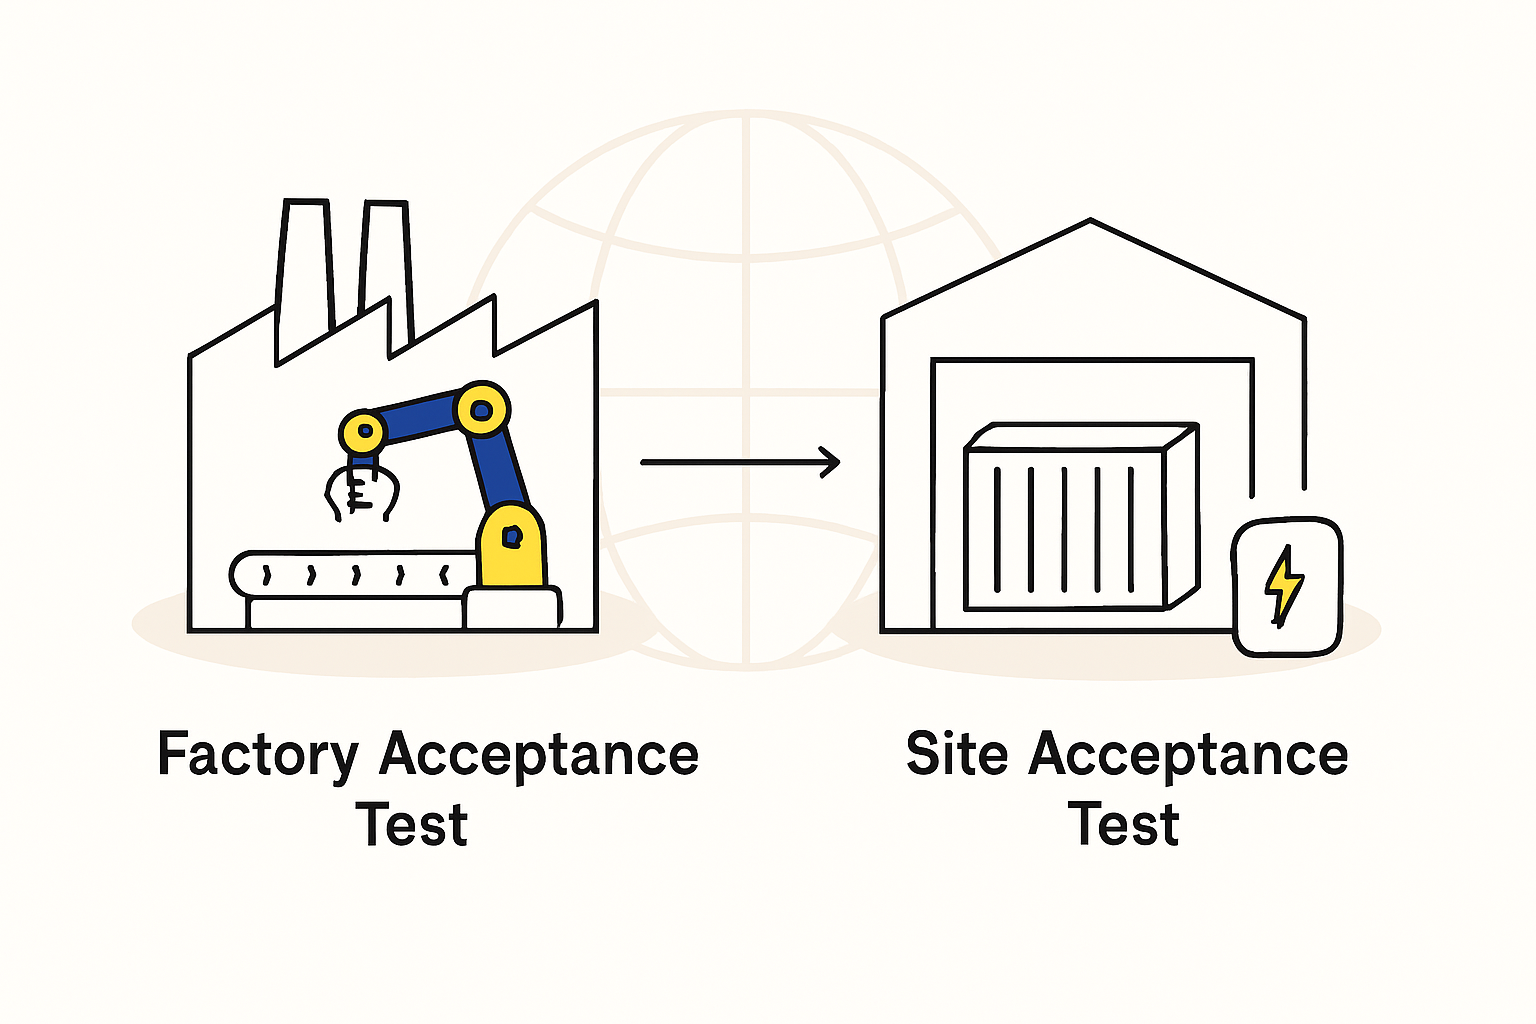
Understanding the Critical Handoff: From FAT to SAT
The importance of this arrival protocol becomes clear once you understand the distinct roles of the Factory Acceptance Test and the Site Acceptance Test.
-
Factory Acceptance Test (FAT): This test is conducted at the manufacturer’s facility before the equipment ships. Its purpose is to verify that the machinery is built to design specifications and can perform its intended functions in a controlled, ideal environment. Passing the FAT confirms the machine’s inherent capability.
-
Site Acceptance Test (SAT): This test is performed at your factory after the equipment has been installed and connected to local utilities like power and compressed air. The SAT confirms that the machine performs to specification within your actual production environment, using your materials and operated by your personnel.
The critical gap lies between these two milestones. While the FAT proves the machine can work, the arrival checks and subsequent SAT prove it does work in its final home after a potentially arduous journey.
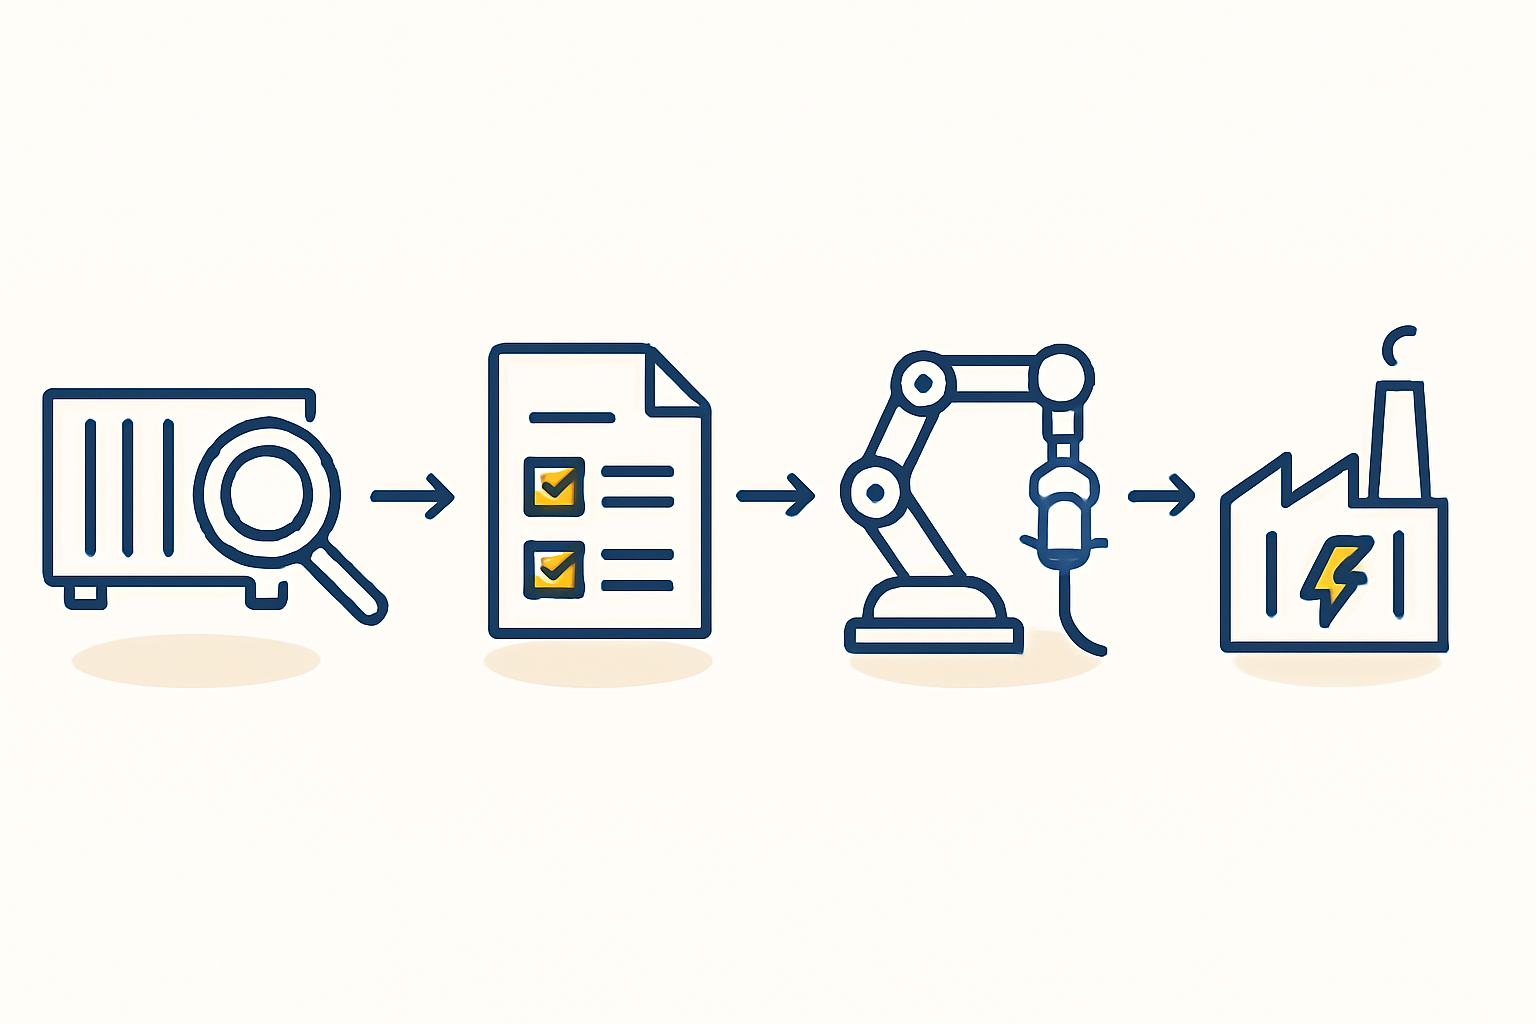
The Arrival Protocol: A Step-by-Step Verification Guide
A disciplined approach upon delivery protects your investment and prevents disputes. This protocol should be a standard operating procedure for every piece of equipment that arrives on your floor.
Step 1: Initial Inspection Upon Unloading
The inspection begins before the machinery is even removed from the container. The condition of the transport vessel and packaging offers the first clues about its journey.
Carefully examine the container’s exterior for signs of significant impact. Once it’s open, inspect the crating and packaging for punctures, water stains, or signs of compression. Check the shock and tilt indicators—small devices attached to the crate that reveal if the shipment was subjected to excessive force or improper handling. Document every observation with high-resolution photographs before unloading begins. This evidence is indispensable for any potential insurance claim.
Step 2: Mechanical and Structural Integrity Check
Once the equipment is uncrated and safely positioned, conduct a thorough visual inspection of its physical structure. This is not a functional test but a detailed survey for transit-related damage. Look for:
- Dents or deep scratches on panels and the main frame.
- Bent structural supports or misaligned components.
- Cracked casings, covers, or safety glass.
- Loose bolts, fittings, or mounting brackets.
Think of this as inspecting the bodywork of a new car before you accept delivery. Any deviation from the pristine condition observed during the FAT must be noted and photographed.
Step 3: Electrical and Pneumatic Systems Verification
This step involves a careful visual check of all accessible electrical and pneumatic systems without applying power. Open the main electrical cabinet and look for:
- Wires or cables that may have disconnected from terminal blocks due to vibration.
- Loose components inside the cabinet.
- Damage to conduits or cable trays.
Similarly, inspect all pneumatic hoses and connectors for kinks, abrasions, or loose fittings. Identifying a disconnected safety sensor or a loose high-voltage cable at this stage can prevent equipment damage or a serious safety incident when power is first applied.
Step 4: Cross-Referencing with the Packing List and FAT Report
The final step in the arrival check is a comprehensive inventory. Using the official packing list from the supplier, confirm that every single item has arrived. This includes the main machine, ancillary components, toolkits, spare parts packages, and all documentation, such as manuals and schematics.
Next, reference the final report from the [[what is a FAT (Factory Acceptance Test) and how does it work?]]. This document serves as the baseline for the equipment’s condition and configuration when it left the supplier. Verify that key components, serial numbers, and even software versions match what was approved. Any discrepancy found now can be resolved far more efficiently than during the pressure of commissioning.
Why This Intermediate Check Is Non-Negotiable
Dedicating a few hours to this verification protocol may seem like a delay, but it actually accelerates the timeline by preventing much larger problems down the road.
Risk Mitigation and Insurance
Damage that occurs during shipping is the responsibility of the logistics and insurance companies. A claim, however, is strongest when the damage is documented immediately upon arrival. If you only discover a problem during the SAT weeks later, it becomes difficult to prove it wasn’t caused by incorrect handling or installation at your site.
Warranty and Supplier Accountability
This process clearly distinguishes between transit damage and a potential manufacturing defect. By confirming the machine arrived in good physical condition, you create a clear baseline. If a component then fails during the SAT, the conversation with the supplier about warranty coverage is much more straightforward.
Preventing Costly Delays
Discovering a missing control module or a damaged motor during the arrival check allows you to notify the supplier immediately. A replacement can be dispatched while other installation work proceeds. Finding that same issue during commissioning can bring the entire line to a halt for weeks, impacting project timelines and budgets. This structured approach also supports proper management of [[the role of the Bill of Materials (BOM) in solar manufacturing]] by ensuring all required physical assets are present and correct from day one.
Common Pitfalls and How to Avoid Them
Entrepreneurs new to industrial projects often face the same challenges. Awareness is the first step toward avoiding them.
Pitfall 1: Assuming “FAT Passed” Means “Ready to Run”
The FAT confirms the machine’s design and function in a perfect setting. It doesn’t certify its resilience to cross-continental shipping. Treat every machine as potentially compromised until it has been verified on-site.
Pitfall 2: Rushing to Power On
The eagerness to see new equipment run is understandable but risky. Powering on a machine with an undetected loose connection or internal damage can cause short circuits, damage sensitive electronics, and create a significant safety hazard.
Pitfall 3: Inadequate Documentation
In any dispute, clear documentation is your strongest asset. A detailed report with dated photos, notes, and signed checklists provides an objective record. From an insurance or legal perspective, if an issue wasn’t documented, it effectively didn’t happen.
Frequently Asked Questions (FAQ)
Who should perform these arrival checks?
Ideally, this should be a joint effort between your local technical team and a supervising engineer from the equipment supplier. This ensures your team gains familiarity with the equipment while having an expert present to identify subtle issues. If a supplier representative isn’t yet on-site, your designated project engineer should lead the process.
What if we find minor damage?
Document it immediately with photographs and written descriptions. Notify both the logistics provider and the equipment supplier, even if the damage appears purely cosmetic. This creates a formal record. Any damage that could affect function, safety, or long-term reliability must be fully resolved before you move on to installation.
How long does this verification process take?
This depends on the complexity of the machine. A simple conveyor may take an hour, while a complex, multi-stage process tool like a laminator or stringer could require a full day. It’s time well invested to de-risk the subsequent phases of the project.
Is this process different from the formal SAT?
Yes, absolutely. The arrival check is a static verification of the equipment’s physical condition and completeness. The Site Acceptance Test is a dynamic performance test conducted after the machine is fully installed, connected to all utilities, and ready for trial production runs. This entire journey—from planning to operation—is part of the [[ultimate guide to setting up a solar panel factory]].
The successful transition from a passed FAT to a successful SAT hinges on the disciplined management of the steps in between. By implementing a rigorous arrival and verification protocol, you safeguard your investment, clarify accountability, and lay a solid foundation for a smooth commissioning process. It transforms the equipment handover from a point of uncertainty into a controlled, professional, and transparent milestone.